Backups and Snapshots
It is possible to take snapshots or clones of the virtual server yourself. This allows you to go back to a previously created configuration, you can do this before you make major changes to your application, for example.
In addition, ITvO makes daily backups with which a virtual machine can be restored on request. Backups are kept for up to 30 days.
Creating a Snapshot
Log in to the OpenNebula Console, with your VUnetId as username.
To access the web interface from outside the VU campus use EduVPN institute access.
Go to Instances > VMs and double-click your VM.
Open the Storage Tab and locate your disk.
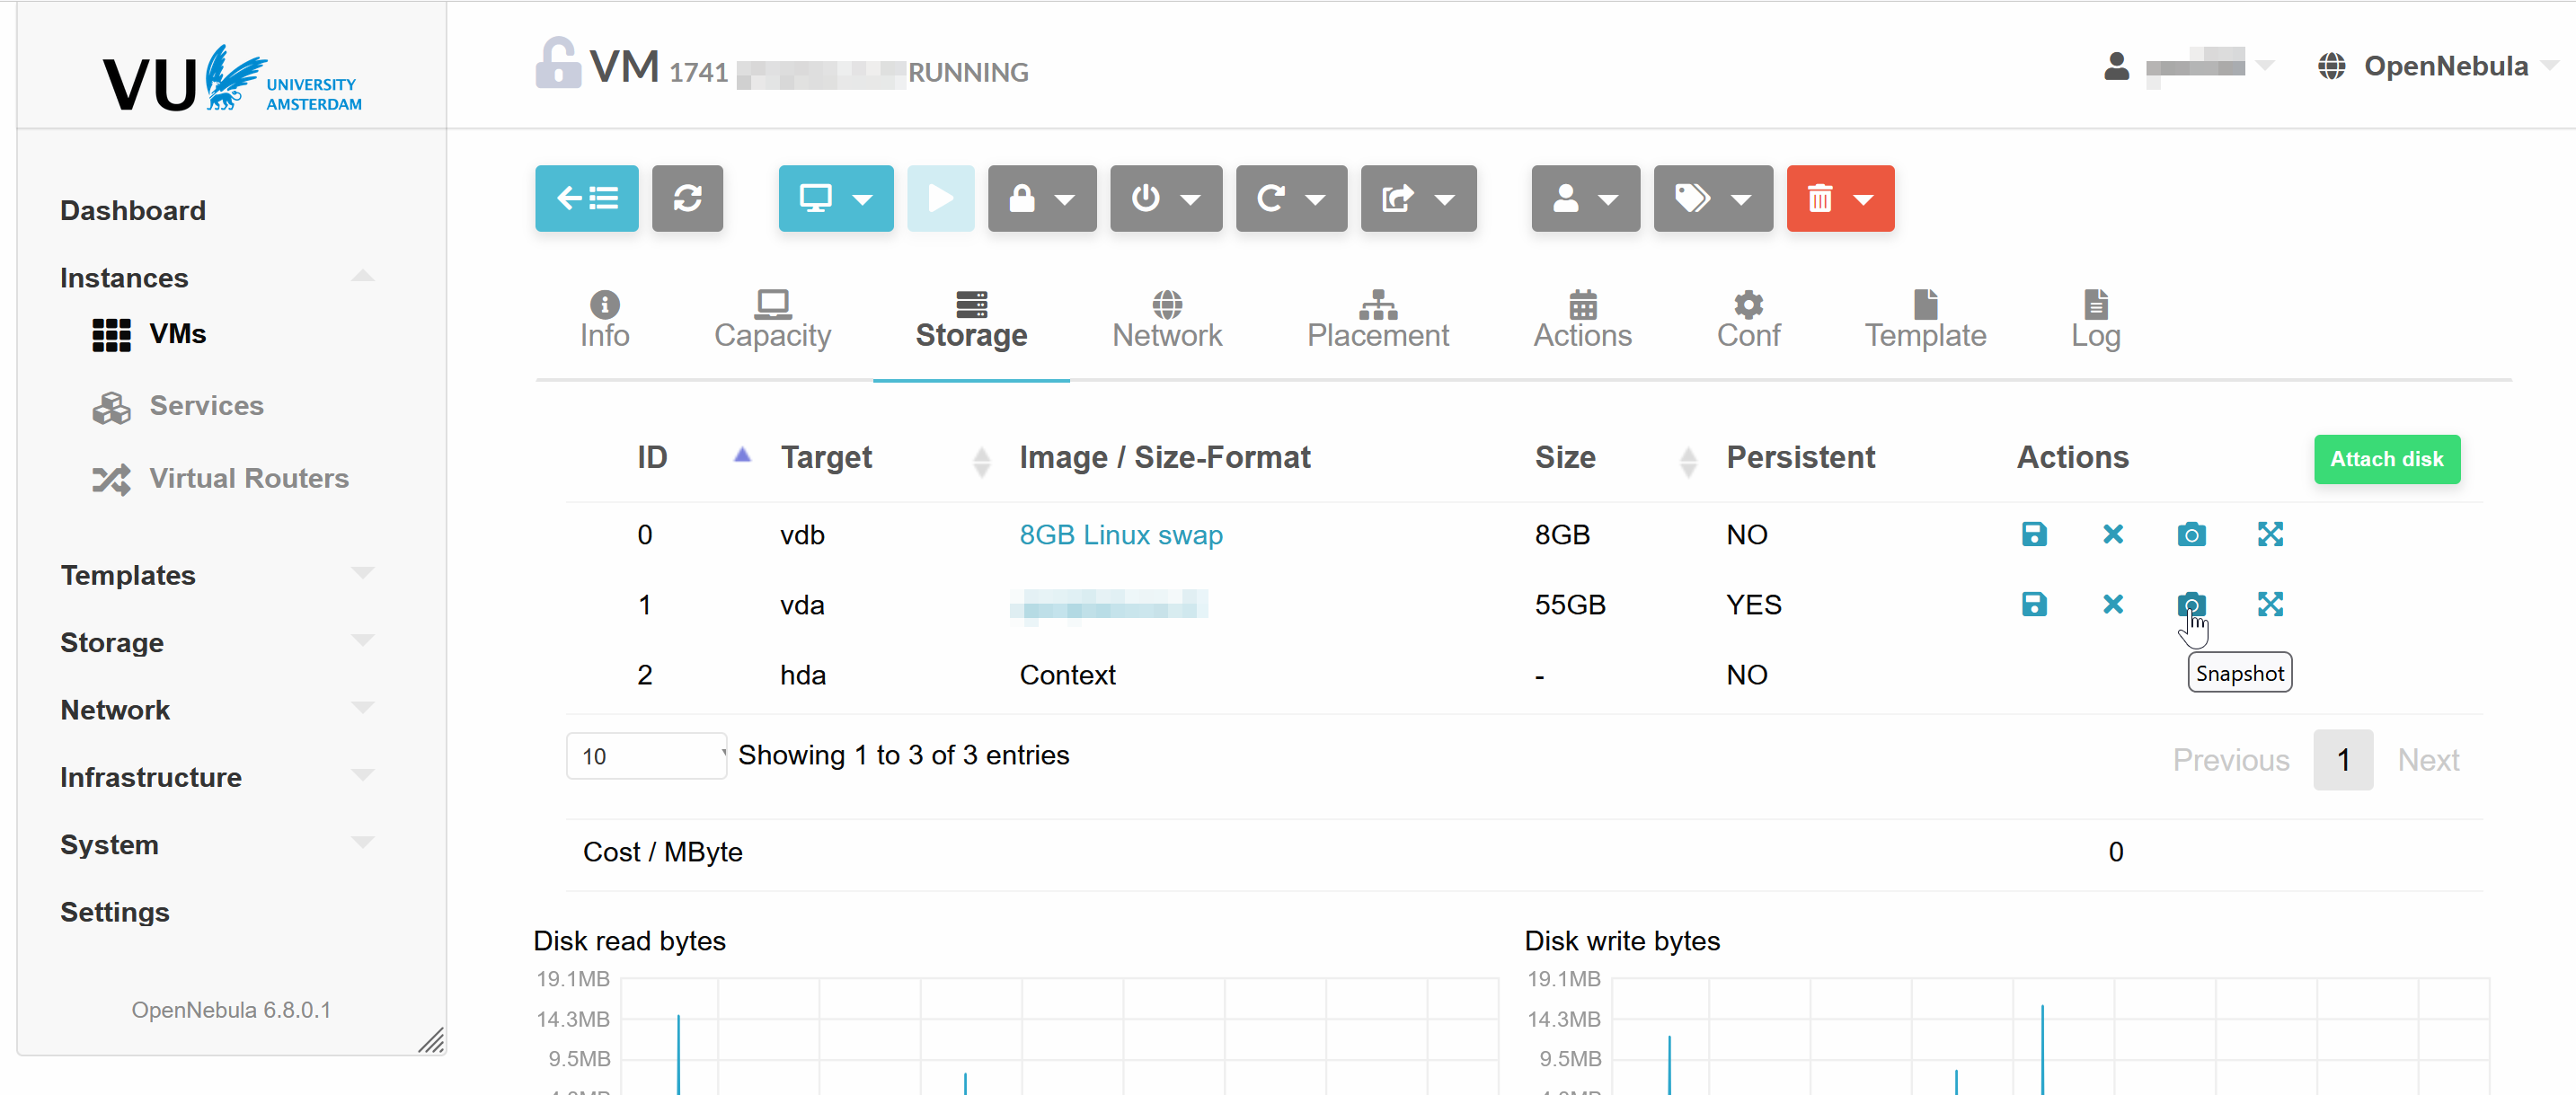
- Click the camera icon to open a dialog.
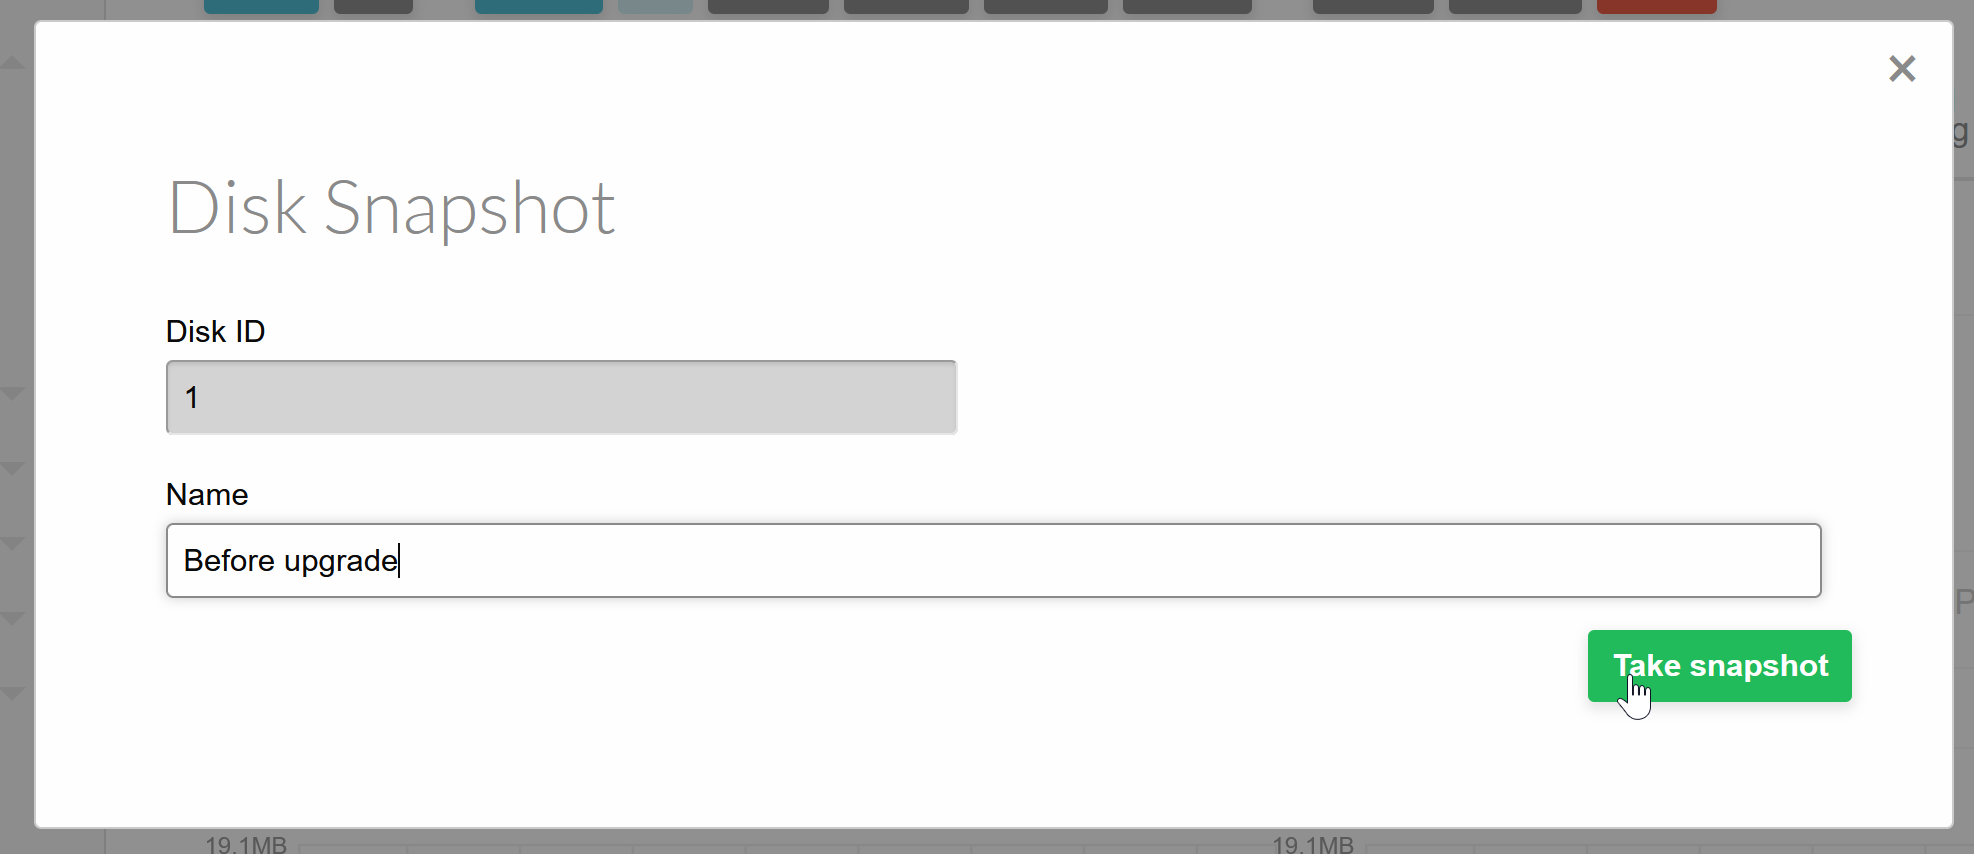
- Enter a name for the snapshor and click the “Take Snapshot” button.
Restoring a Snapshot
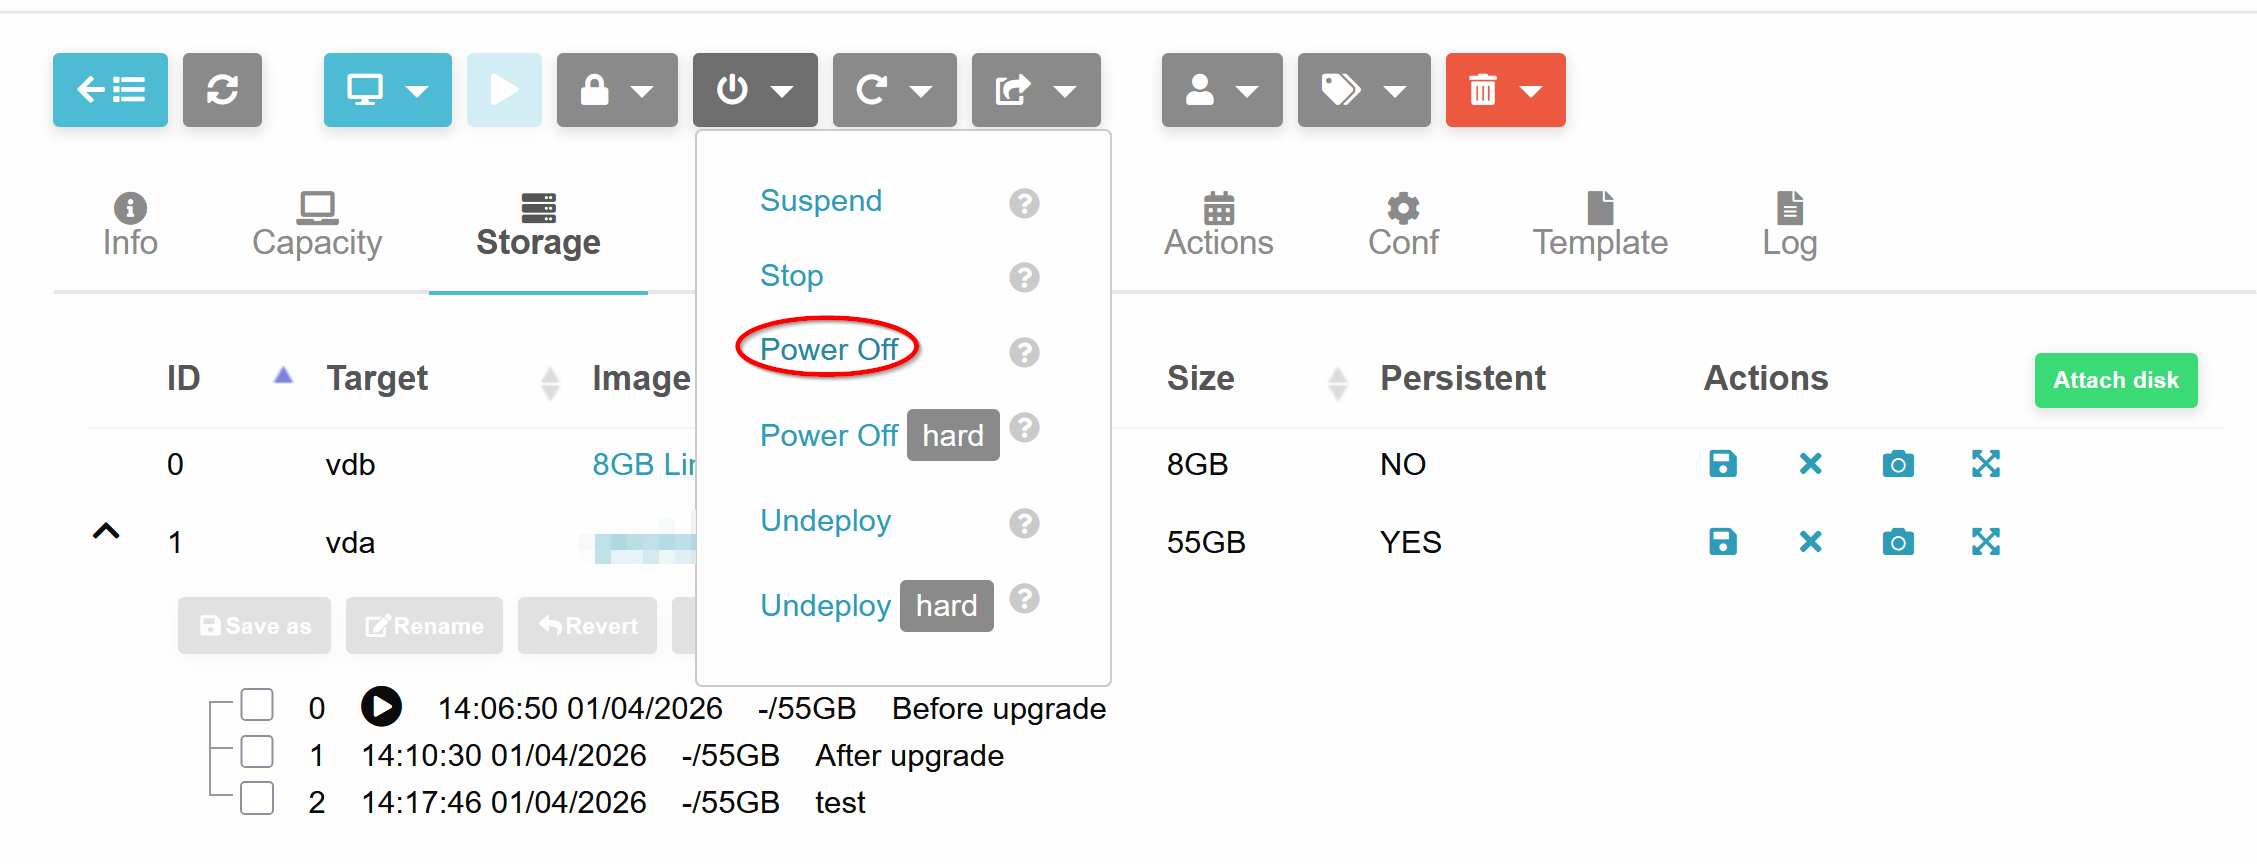
To restore a snapshot the VM has to be shut down. Click the Power button and select the Power Off button, the server will be send a shutdown signal.
If snapshots are available downward chevron will be shown next to the disk, click on it to view the available snapshots.
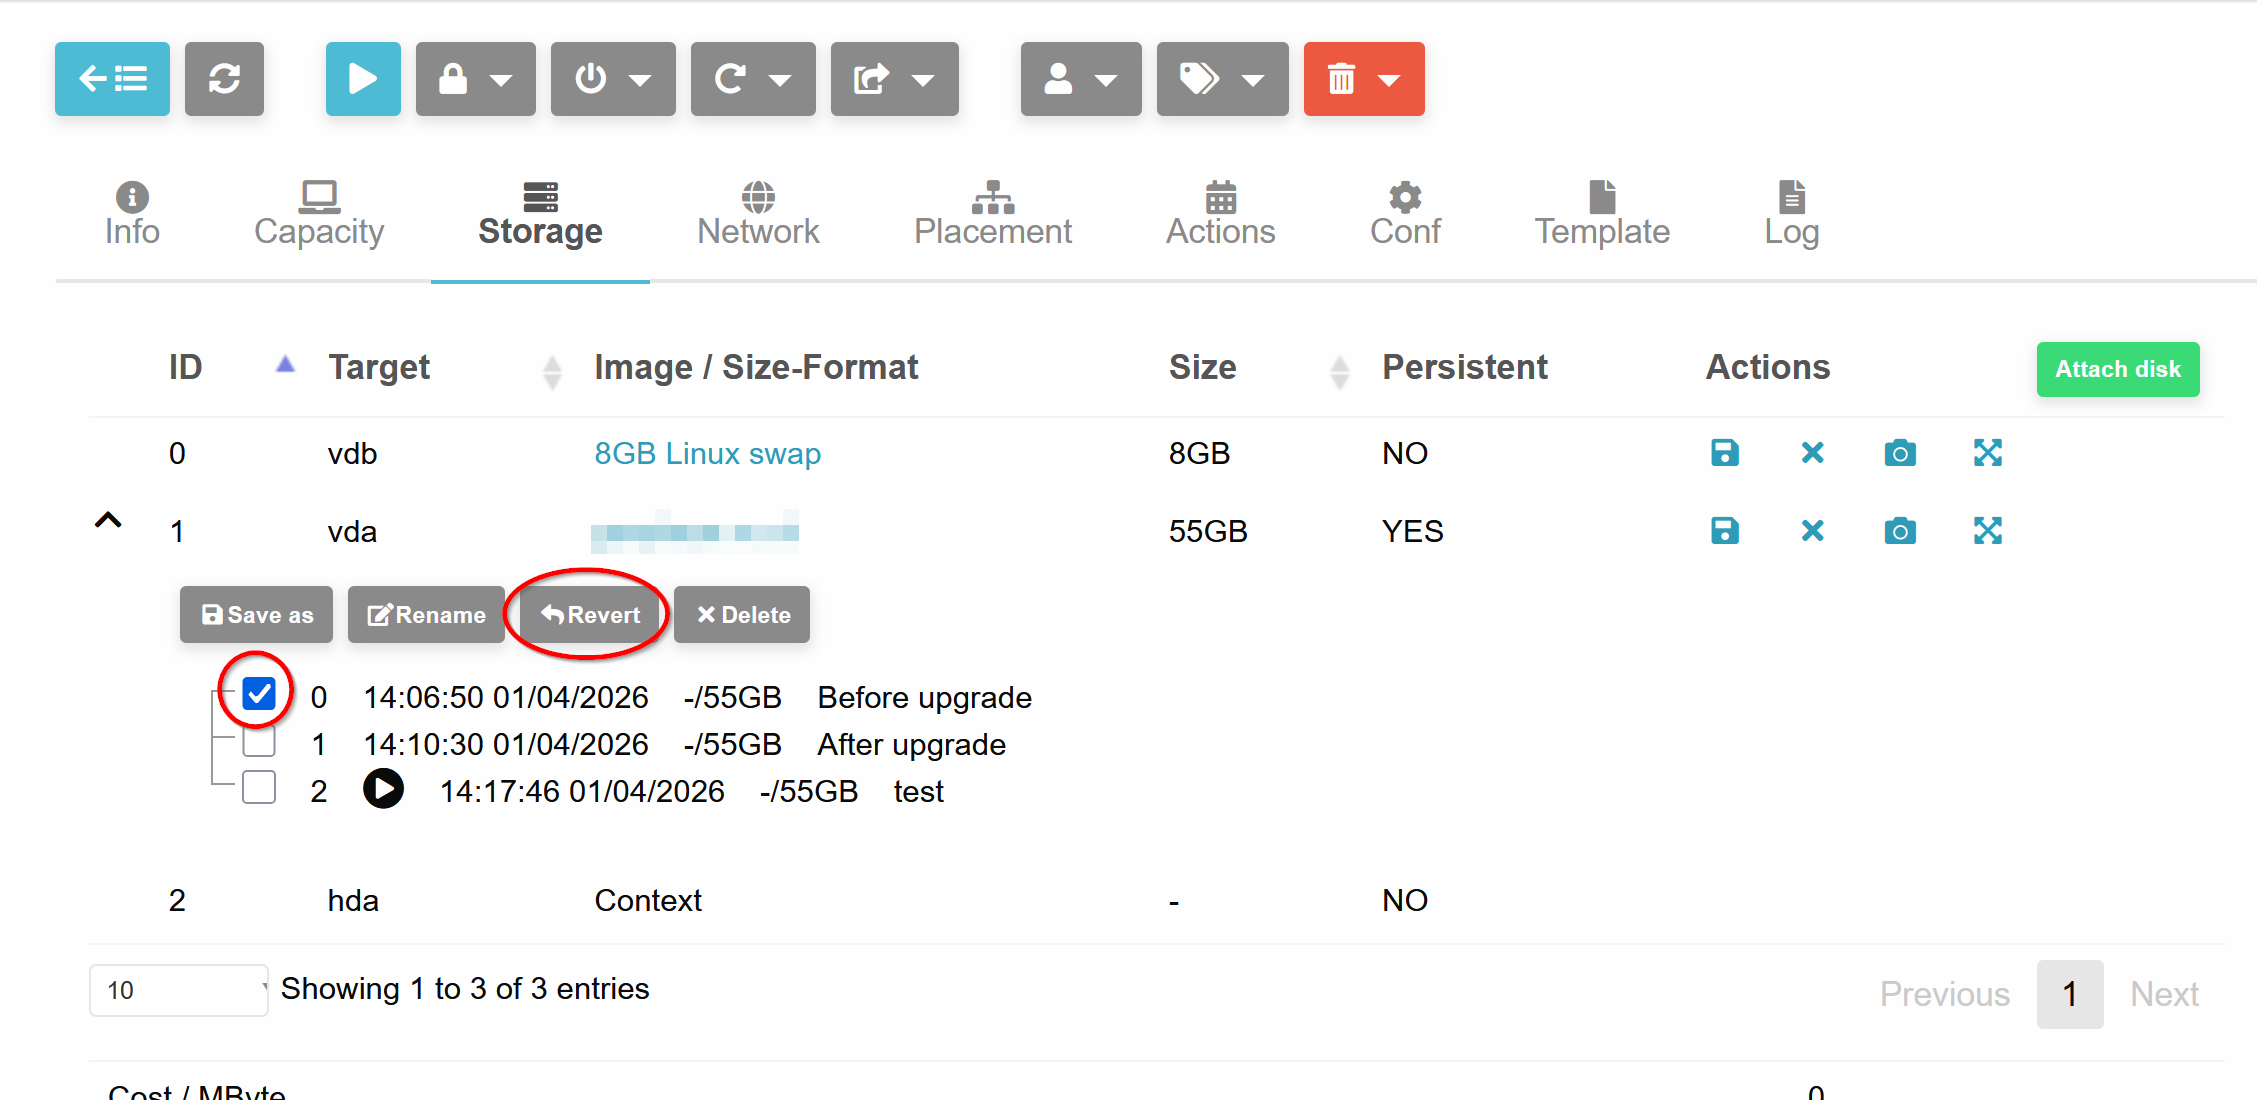
- Check the snapshot you like to restore and click “Revert”.

- Power on the server by clicking the Play button