Quick Start
The IT for Research (ITvO) Team will set up the server(s) with the OS of your choice (Windows or Linux) and will set up a root/administrator account for you.
Access to the Server
To access the server from outside the VU Campus use EduVPN institute access.
Linux servers
In Windows 11 an SSH client is installed by default and SSH commands work in the Command Prompt and Powershell. It is no longer necessary to install software such as Putty.
For access to a Linux server you will need to provide a personal SSH key protected with a passphrase. You will be able to access SSH from outside the VU Campus.
Create an SSH Key Pair
To create a new SSH key pair do the following:
ssh-keygen -t ed25519 -C "m.y.name@vu.nl" Works on Linux, Mac and Windows command line. Make sure to enter a passphrase for enhanced security.
You keep the private key yourself, store it in /home/<username>/.ssh/ (in Windows %USERPROFILE%/.ssh/). The ITvO team will ask for your Public Key.
Log in
To access the server, use the command:
ssh -i <mykey> <mymachine>.labs.vu.nlSoftware Carpentry has an online lesson for beginners available on working with Shell commands.
File transfer
You can transfer files from the command line to your server by using the scp-command. Or use a (free) GUI client such as WinSCP or Cyberduck.
Of course it is also possible to connect to VU-supported storage tools such as Yoda and Research Drive. Consult the Tool manuals in the Handbook to learn how to connect to these services in Linux.
Windows servers
ITvO will create a username/password for you.
For access to Windows servers use Remote Desktop Protocol (RDP). Connect to EduVPN and use the Remote Desktop Connection (RDC) app to connect.
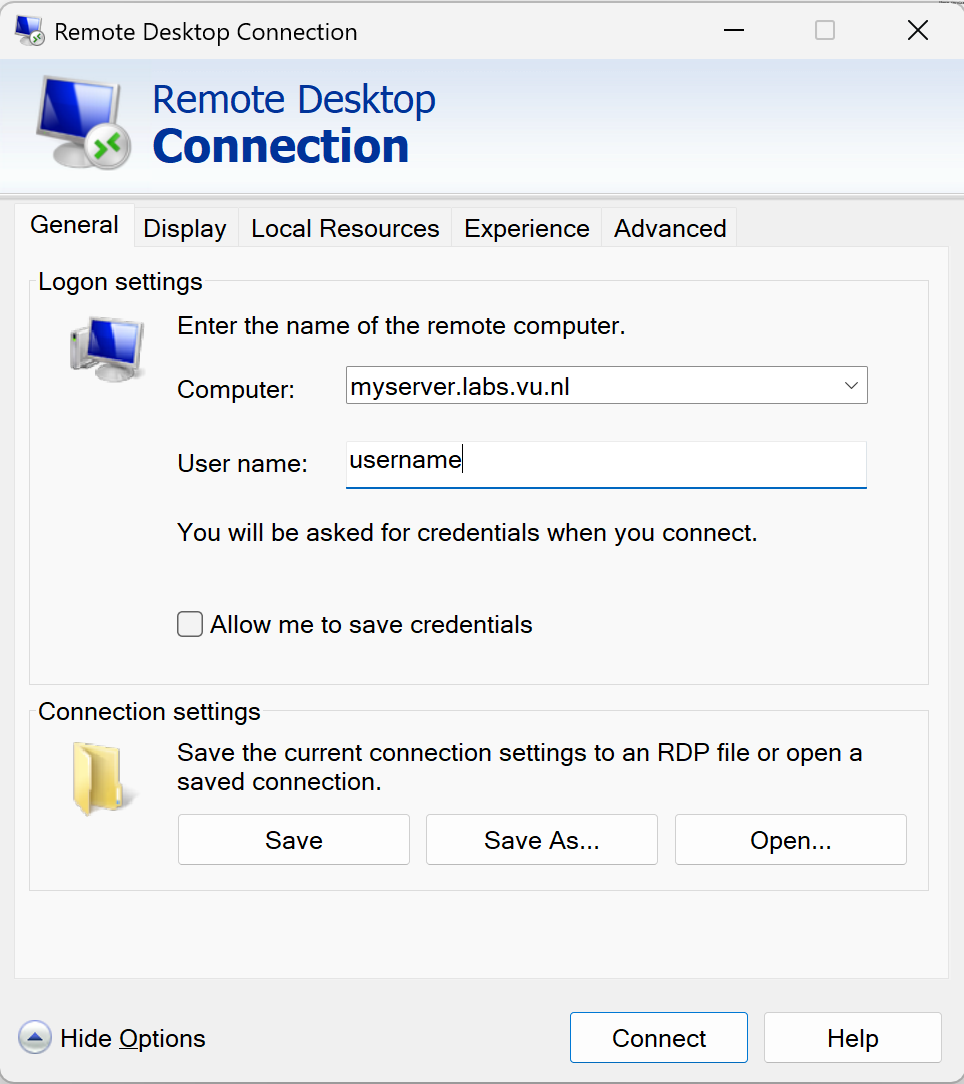
File transfer
You can connect disks to the Remote Desktop session:
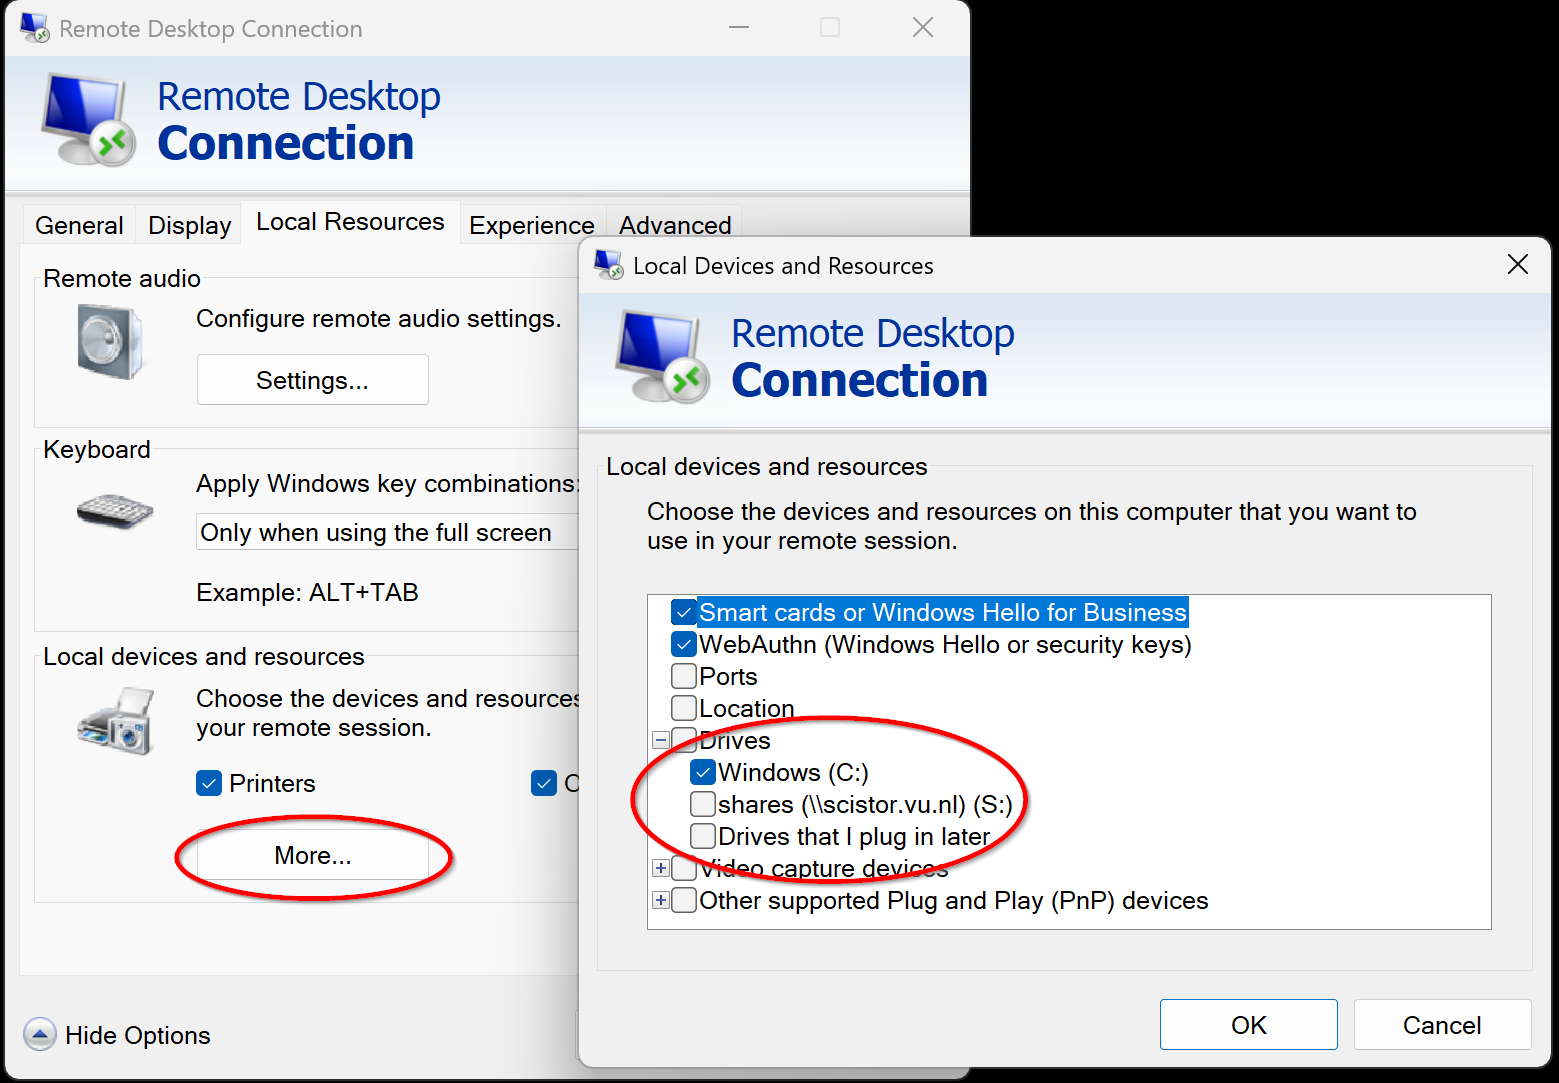
- Click on the “Show Options” dropdown in the RDC window.
- Navigate to the “Local Resources” tab.
- Under “Local devices and resources”, click on “More…”.
- In the “Local devices and resources” dialog, check the boxes for the local drives you want to share (e.g., C:, D:, or other specific drives).
- You can also select particular folders if supported.
Accessing Files on the Remote Machine:
- Once connected, open File Explorer on the remote session.
- Look for a section titled “Redirected drives” or similar under This PC.
- You will see your local drives listed, allowing you to browse and transfer files directly.
Of course it is also possible to connect to VU supported storage tools such as Yoda and Research Drive. Consult the Tool manuals in the Handbook to learn how to connect to these services in Windows.
Firewall
If you chose a server on the external network only ports 80 and 443 (HTTP and HTTPS) are accessible from the internet. Contact IT for Research if you need access to additional ports.
The OpenNebula Console
Your VM runs on OpenNebula software. Usually there is no reason to interact with this software, except for Troubleshooting and Backups.
You can log in to the OpenNebula console, with your VUnetId as username.
To access the OpenNebula Console from home use EduVPN institute access.
Installing Software
Administrator/Root access to the server allows you to install all the software you need, on Linux use the sudo command.
On Ubuntu packages can be installed via apt. To download software from other sources you must make sure to configure access via the Web Proxy.
Note that IT for Research can help you to get started, but you are responsible for installing and maintaining software yourself!
OS Security updates are installed automatically. IT will upgrade the OS to a newer version if needed to make sure it stays supported.